Basuri Air Horn Installation Guide
The Basuri Automotive Air Horn kit is a pre-assembled and ready-to-use system that provides a powerful and attention-grabbing horn for vehicles. Designed with convenience in mind, this kit comes complete with all necessary connections set up, including a controller for easy operation.
Ideal for automotive applications, the Basuri Automotive Air Horn ensures a loud and clear signal whenever needed, enhancing safety and alertness on the road.
Now time to check the process of air horn installation. So let's start
Step 1: Get a Basuri Air Horn kit

The Basuri Air Horn kit comes pre-assembled with all connections set up, including a controller for controlling the horn. This makes installation and usage straightforward and convenient for users. The kit likely includes everything needed to install and operate the air horn system without the need for additional assembly or wiring.
Step 2: Selecting the Installation Location
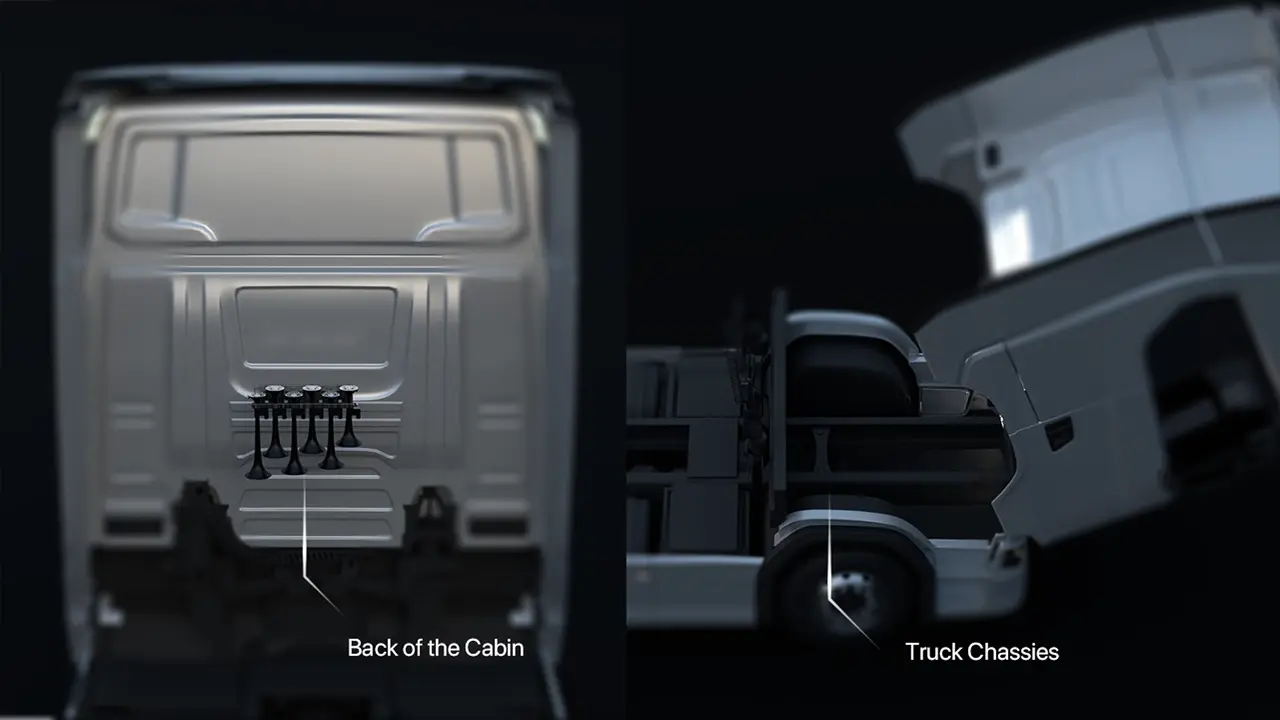
Evaluate the ideal placement for the horn trumpet on your truck. Assess factors like accessibility, protection from external elements, and sound projection. Choose between mounting it underneath the cabin chassis or on the backside of the truck chassis. Ensure the selected location allows for secure installation and easy maintenance access.
Step 3: Location for the Horn Controller
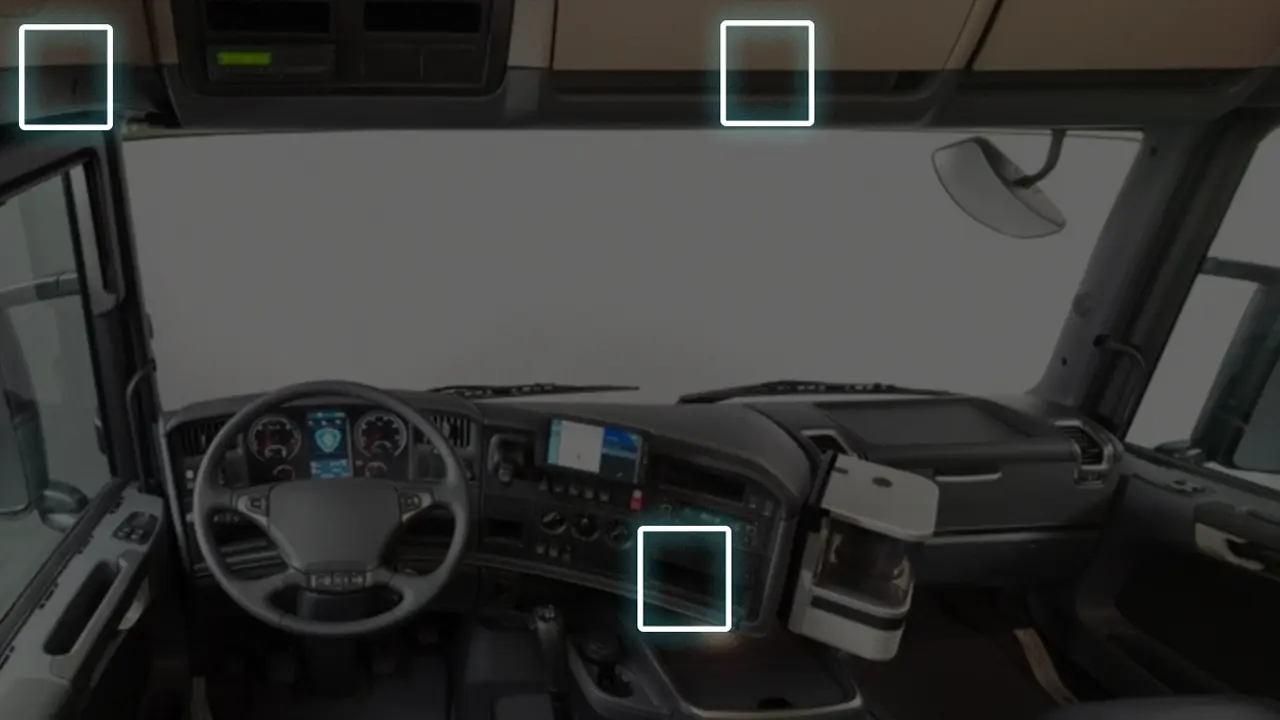
Now you have to choose the location for the air horn controller inside the truck cabin. There are some options suggested in the above images but you can also explore the right place based on driver convenience, visibility, and ease of access while driving. Additionally, ensure the chosen location protects against potential damage and allows for secure mounting of the controller.
Step 4: Connect the Hose Pipe
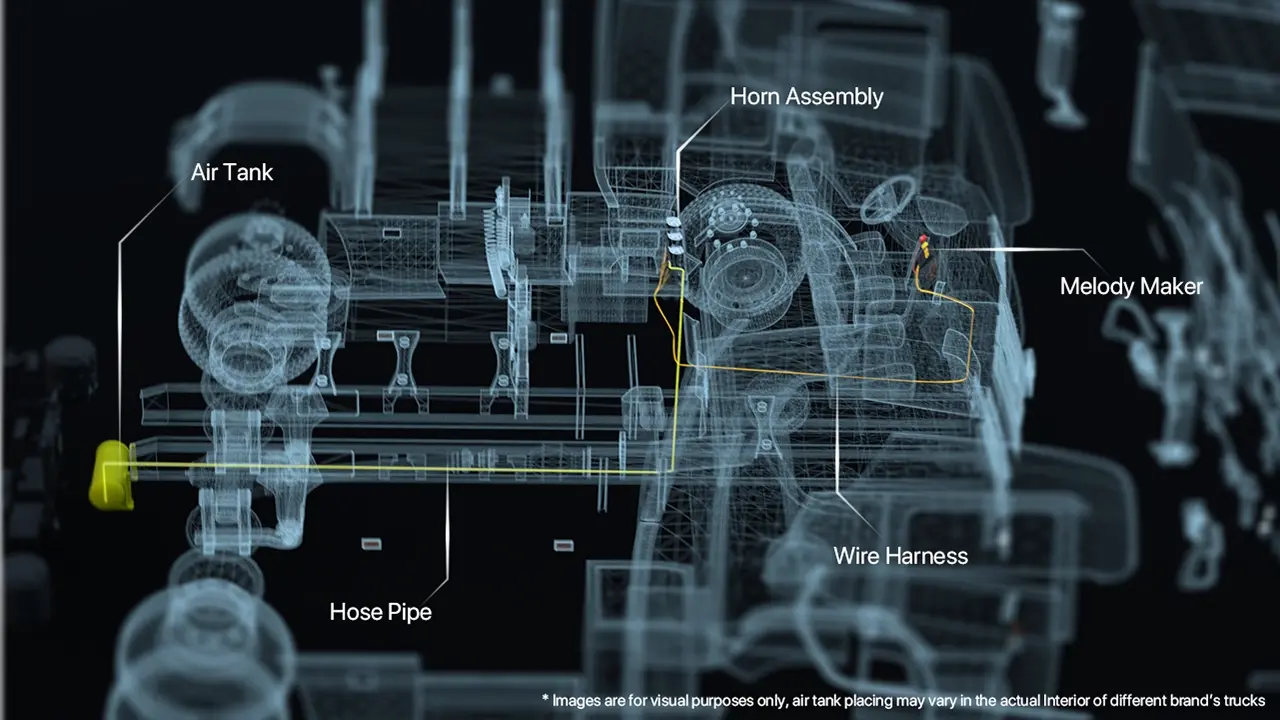
Connect one end of the hose pipe to the air horn outlet and the other end to the compressor. Make sure the connections are tight to prevent air leaks.
Step 5: Install the Horn Button
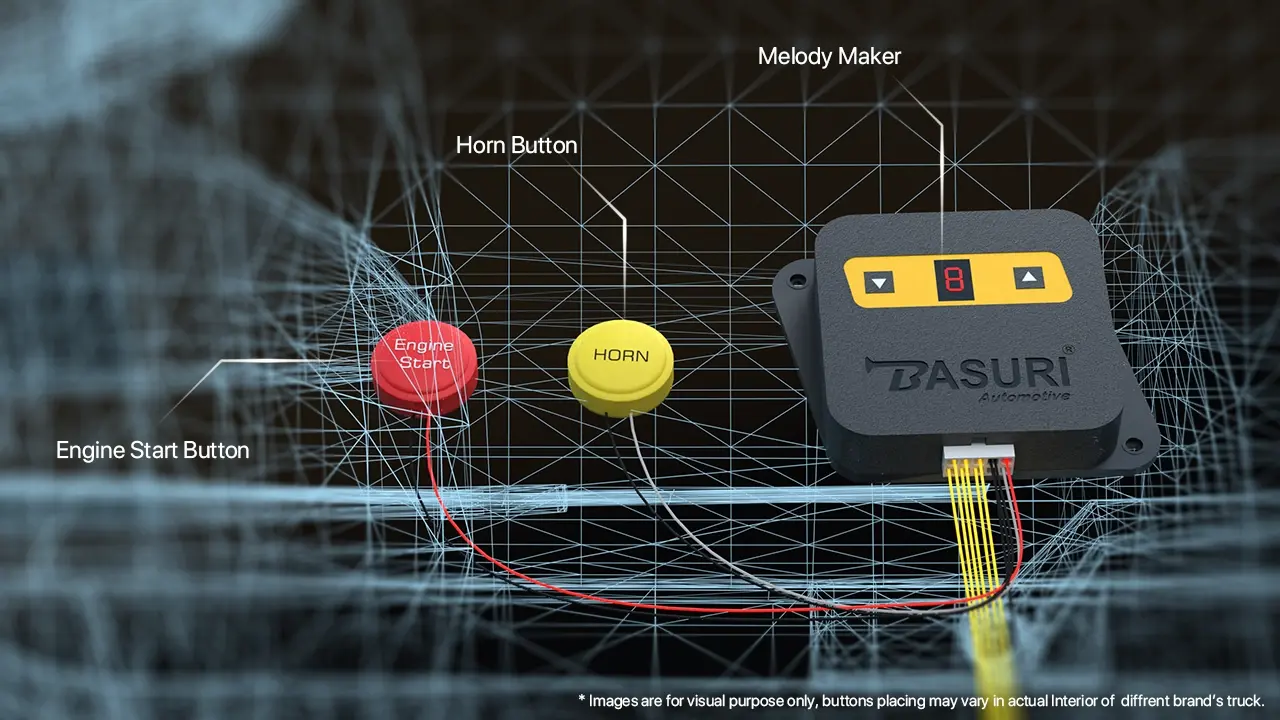
Mount the horn button in a convenient location within the driver's reach. Connect the wire from the button to the remaining wire from the horn kit. Make sure the horn button and engine start button are connected properly on the air horn controller.
Step 6: Test the Horn & Final Checks
Once all connections are made, test the air horn to ensure it's working properly. Press the horn button to activate the horn and listen for the sound.
After confirming everything is working correctly, secure any loose wires and use electrical tape to insulate the connections. This helps prevent electrical issues and ensures longevity.
Do a final check of all connections and mounting points to ensure everything is secure. Test the horn once more to be certain it's functioning as expected.
Congratulations! You've successfully installed the Basuri Automotive Air Horn Kit on your truck. Enjoy the powerful sound and enhanced safety on the road.